Sunday, 14 September 2014

ABC Cake

I can't remember where I found the recipe this is based on but I'm fairly sure it was one I found while trying to use up an enormous glut of courgettes. My Mum grows courgettes and apples so from August until the damn things die off we're inundated with them. Now I live away from my parents the effect on me is lessened but I still get the occasional vegetable delivery.

ABC stands for Apple-Banana-Coconut, which is the version I made for Ceilidh & Warwick's party but this recipe is pretty adaptable:
- I've used courgettes, apples, and carrots individually and in mixtures and they all worked fine.
- Walnuts are the classic choice of nuts but coconut works surprisingly well
- Dried cranberries or other fruit make for a sweeter & more exciting cake
- It's quite easy to turn this vegan as the only non-vegan ingredient is the eggs. I've made it several times successfully using flax eggs - one egg = 1tbsp ground flax (golden linseed) + 3tbsp water.
- I usually use brown sugar for the flavour
- C&W version had ~1/2tsp each of cinnamon, nutmeg, & ginger instead of the 1tsp of cinnamon

ABC Cake

in progress

Cook time: 55-65 min

Ingredients: 
Vegetable oil: 5tbsp
Sugar: 125g
Eggs: 2
Flour: 250g
Bicarbonate of soda: 1tsp
Salt: 1/2 tsp
Cinnamon: 1tsp
Bananas, mashed: 2 whole / 150g
Apple, grated: 120g
Nuts: 50g
Dessicated coconut: 25g (optional)

Directions: 
1. Pre-heat oven to 180c / 350F / Gas Mark 4
2. Grease and/or line (with greaseproof paper) a 900g /  2lb metal loaf tin
3. Mix oil & sugar, add eggs & beat
4. In another bowl, mix flour, bicarb, salt, & cinnamon
5. Add dry mixture to wet, alternating with mashed banana
6. Stir in grated apple & nuts, add coconut (if using), and mix thoroughly.
7. Transfer to the prepared tin and bake for 55-65 minutes, check a knife inserted comes out clean, then leave to cool in the tin for at least ten minutes before turning out

Please excuse the giant heading  - I've attempted to use standard recipe markup so that Google, Pinterest etc will recognise this as a recipe.

Brownies

This is go-to brownie recipe. I picked it out originally as the amounts of butter & sugar are slightly less horrendous than other brownie recipes. If you cook these for the recommended time they'll come out squishy, but cook a bit longer and the result will be cakier. These can also be made in small cake format - bake them as you would fairy cakes and check for done-ness earlier. I often use chunks of chocolate or dried fruit (cranberries especially) instead of nuts. I also go heavy on the cocoa as it really does help the flavour. I've had good results using dark chocolate, milk chocolate, and a mixture of both.

Brownies


Adapted from a recipe from Coconut & Lime

Prep time: 20 min
Cook time: 30 min
Total time: 50 min

Ingredients: 
Butter: 4oz/112g
Dark chocolate: 8oz/225g
Cocoa powder: 1oz/30g
Plain flour: 3/4 cup/90g
Nuts: 3oz/85g
Salt: 1/4 tsp
Baking powder: 1/2 tsp
Golden caster sugar: 3/4 cup/170g
Eggs: 2
Vanilla essence: 1 tsp

Directions: 
1. Pre-heat oven to 180c / 350F / Gas Mark 4
2. Grease or line (with greaseproof paper) a 9"/22.5cm square tin or equivalent
3. Melt butter, chocolate, & cocoa together (don't microwave the cocoa if using a microwave)
4. Mix flour, nuts, salt, & baking powder together
5. In a large bowl, beat the eggs, sugar, and vanilla together until frothy
6. Add the chocolate mixture to the eggs, stirring as you go
7. Gradually add the dry ingredients and mix until well combined
8. Splodge into the prepared tin and bake for 25-30 minutes. The top should form a crispy shell and a knife inserted should come out clean.

Please excuse the giant heading  - I've attempted to use standard recipe markup so that Google, Pinterest etc will recognise this as a recipe.
Wednesday, 21 December 2011

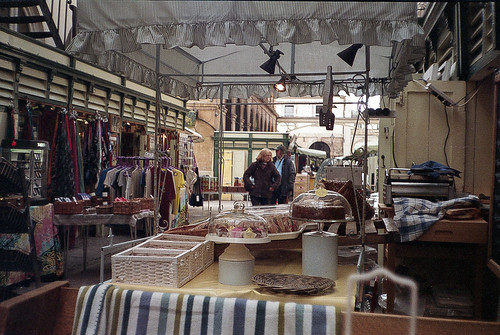
St Nicks Market

Long time no post, I've been using Tumblr for my photoblogging needs. It's seductively simple to post a photo from my Flickr on there. Sorry Blogger.
This is cross-posted from there, it's a collection of photos of one of my favourite places in Bristol, St Nicholas Markets.

Covered Market
At The Sourdough Café
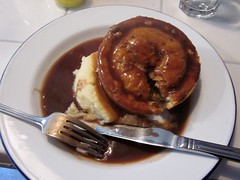
Vegan Special Pie!
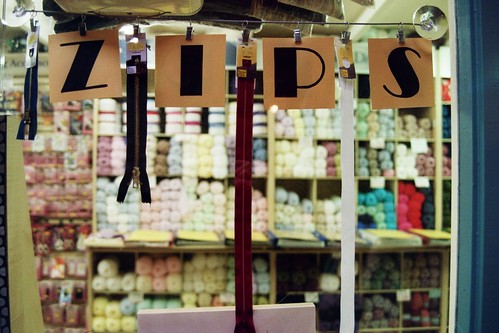
Zips
Buttons 
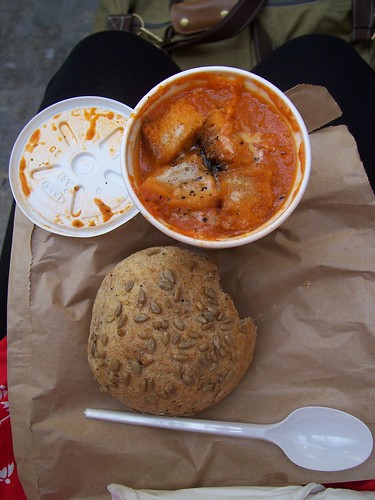
Soup!
Coffee & Postcards

Sunday, 25 September 2011

Afghans

Possibly the smallest afghans I've ever made.
I've just realised that despite posting several photos of them on Flickr over the years (1, 2), I've never actually posted the recipe for Afghans. Yes, it's a strange name for a biscuit but they're completely ubiquitous in New Zealand. Afghans are a kind of chocolate biscuit with cornflakes in. They contain no eggs and aren't overly sweet. It's a very particular taste - a surprisingly good combination of dry-ish biscuit, chewy cornflake, sweet icing and walnut.
We discovered them on a family holiday in 2003 and searched for a recipe for ages, trying the few versions we could find on the internet with limited success. One day I realised that they featured in Mum's favourite old battered Penguin Cookery Book from the seventies which was written by Bee Nilson, a kiwi. We've been making that recipe ever since and they're pretty much spot-on.
My copy of the Penguin Cookery Book was found in one of the many St Peter's Hospice shops here in Bristol and is even older - the last date printed is 1965 and it has mould spots!
So, without further ado, here's the recipe:

Afghans
Cooking time 20 minutes. Temperature 350F, Mark 4, ~180C.
Allegedly makes 2 dozen, although we tend to make about 8 larger ones.
7oz melted butter or margarine (1 c)
6oz plain flour (1 1/4 c)
3oz sugar (6 tbs)
2oz cornflakes (2 c) - non-Kelloggs work better here. Kelloggs are too thin and melty
1oz cocoa (3 tbs)
1/4 tsp salt
Vanilla essence
1 doz shelled walnuts - a.k.a. 24 halves, I wonder if they came ready-shelled in those days?
Chocolate icing - refers to another recipe in the book, but I'm sure you can figure this one out

Mix all ingredients together and put in small spoonfuls on an ungreased tray. Bake until firm. When cold drop a blob of icing on top of each and press on half a walnut.

There you go! Nothing fancy at all. Perfect with a nice mug of coffee or possibly a kiwi-esque flat white (or flit whaite if you must do the accent.)

Saturday, 27 August 2011

See No Evil

Last week the whole of Nelson Street in central Bristol (UK) was shut off for a rather exciting project. Nelson Street is normally dull, grey and a bit manky - it's home to several nightclubs, a derelict magistrates court and the back of the police station - but someone had a good idea.
Bristol is well-known for its street art scene and Inkie, a local, brought the city council and street artists from all over the world together to brighten the area up. The whole thing was called See No Evil.
I missed the street party that accompanied the finishing of the project on Saturday, as well as the temporary boards which had been painted on, but what's still there is pretty awesome. I went down on Sunday and took a load of photos, so here they are in a neat slideshow.


More photos will eventually end up on Flickr but I don't see that happening for a while yet.
You don't want to see those anyway, there are loads of great ones over on Flickr.
There's a dedicated group, the Bristol group and Swishrelic's set, then there's the ever-awesome F***YeahBristol tumblrlog, and the project's own website.

Monday, 13 June 2011

I've been very quiet around these parts of late, but that's mostly because I've been being good and doing University work rather than faffing on the internet. The faff I have allowed myself is over at dichohecho.tumblr.com where I've been posting a picture a day (or as often as I manage) from my Flickr (which is also lagging a bit). I thought I should probably post something on here since Jess linked me :)
So, I shall try and keep this more updated; never mind that the last photos I posted were from September, I'll start afresh.

Here's Sporti:


He's an Iford Sporti 6 and makes square pictures on 120 film. In Niall's words the English Holga (well English company, they were made in Germany). He works a lot more reliably than a Holga though, no wrapping him up in electrical tape to avoid light leaks, plus a choice of apertures!
Of course he still has no metering so I have to guess (or use my ME Super to meter) but *so far* I've managed alright. Being a Sporti 6 rather than an earlier version he has double exposure prevention, but I don't mind too much. I've got my Lubitel(assuming it works) for that!

Here are some photos from my first film, shot on a cold, grey & misty February Sunday.

 Up in Kingsdown, I love these narrow streets that give you a slice of view down to the city centre.

Shiny old car, Kingsdown Parade 

 Ben on his bike

Me, taking a Bristol cliché photo

When I developed these it was pretty hot and I had a massive special and merrily started developing the roll with the chemicals I'd used for my 35mm films. Just as I started agitating the tank I realised I should have a couple of hundred ml more developer in there. Oops.
I hastily made up some more and chucked it in and carried on, for the stop & fix I just used the smaller amount and agitated it more than you're meant to. Amazingly they came out ok, you can see tide marks vertically on some of the photos, but clearly that's the aesthetic I'm going for, yeah?
They could still be horrible negatives but the lovely Niall scanned them for me so I got away with that one.
Next time I will get it right. I hope.